Friday, April 1, 2011

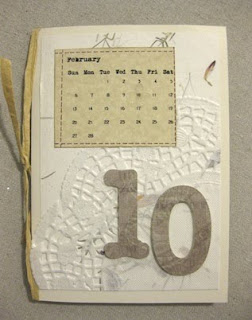
Birthday Card: Dressed in Twine, Part IV - Top Load Notecard Holders

On the day I started this project, I received my very first batch of bakers twine in the mail. I ordered several samples from SeeSpotStamp's Etsy Store after doing calculations upon calculations of the cost per yard for all the bakers twine sold on Etsy. SeeSpotStamp had the best price for nice colors at about 6cents per yard. Can't beat that considering other brands were coming to 20cents per yard.
Lets regress to the elements that comprise of this project:

[Theme] This project got it's pink theme because I wanted to use the Cherry colored bakers twine
[Dress Form Shape] Because the theme was pink, I chose to use Silhouette's dress form shape. I make it a habit to open Silhouette Studio each week to download the free shape of the week. The dress form was that weeks shape.
[Birthday cutout] How dull would it have been if I just made the text straight across? Luckily I stumbled upon this Silhouette tutorial that demonstrates the ease of laying out text along a line or a shape. I should have known that the font was going to cut real thin. Unlike the other two holders, I had to reinforce this one because it was too flimsy alone. I glued a 3"x3" square piece of cream colored cardstock that was stamped using a circle pattern rubber stamp and distress ink.
And this birthday card for my sister concludes the Top Load Notecard Holder sequence!

Sunday, March 13, 2011

Birthday Card: Doily for a Dolly turning 30, Part III of Top Load Notecard Holders

She's a classy lady. So I had to make it a classy card. My favorite detail is the doily. This was a last minute addition inspired by Martha Stewart's Valentine's Day Doily Envelopes idea. I wanted something to show behind the '30' cutout but I didn't know what. Good thing I stopped at the dollar store for the doilies!


Thursday, March 3, 2011

Birthday Card: Happy Birthday Man, Part II of Top Load Notecard Holders

I always have trouble coming up with ideas for men's cards. That was until I stumbled upon a random scrapbook post by Kerri Bradford. I want to take a moment now to give her praise. I absolutely love the organized composition of all her work. It's so tidy and creative!
Lets regress -
[PAPER] Designing the 'BIRTHDAY' cut was easy. Cutting the paper was the tough part. After buying Wausau paper at Target, I now understand why that cream color cardstock at Print Icon was on sale for $3. Wausau paper cuts consistently using the yellow Silhouette Plunger Tip. The discount Print Icon paper required an hour of Xacto kniving even after the Silhouette took its cut at it. NOT FUN. I'll be sure to limit any cutting projects for the Print Icon discount paper.
[HEAT EMBOSSING] While I'm on the topic of cheap paper - look what happens when you try to heat emboss black embossing ink onto cheap paper. It melts and winds up looking like a horrible print job. NEVER AGAIN.
[LABEL SHAPE] After cutting the 'BIRTHDAY', it reminded me of the black and white marble notebooks we used to have in grade school. So, to give it the name label look, I used one of the 50 free shapes I got with my Silhouette. Using a pen and the Silhouette Pen Holder, I noted who the card/notebook belonged to.
Not so bad after all with a few additional details.


Friday, February 25, 2011

Birthday Card: Baby's First Birthday

I got a chance to mix up a few things for this card.

Background: Cocoa Background is embossed using the Cuttlebug polka dot impression folder.
Balloons: Cut using the Silhouette SD and tied with hemp cord.
#1: Fabric stiffened using Stiffen Stuff and cut using the Silhouettte SD.
#1 outline: Using Silhouette Studios Offset functionality, the outline around the #1 is cut from vellum paper.
Ribbon & Doily: How did we tie up the loss ends? With a cutout of a doily and some ribbon.

Monday, February 21, 2011

Texture Embossed Card: To Cuttlebug or not to Cuttlebug?

I decided that since I already have the Silhouette SD, the texture boutique would suffice.
In the short time that we've been together, my relationship with the Sizzix Texture Boutique has become one of love.
It came just in time for me to wish a friend a happy 2 year wedding anniversary and another friend a happy birthday. Its amazing what a little texture can do to a solid color card stock. These cards were surprisingly very easy to make. WYSIWYG.


Thursday, January 27, 2011

Birthday Cards: Part I - Top Load Notecard Holders

I'm SUPER excited about these three birthday cards. These are inspired by Kerri Bradford's Signed.Sealed.Delivered. Kit. I decided to step away from bi-fold cards for a little while and went with top loading 'notecard holders' since they can't really be called envelopes. And I finally got to use the Polka Dot paper I bought on sale from Print Icon. I'm so happy I did!
The problem with making cards so far in advance is that I don't get to post about them until the recipients have received them. But the upside of having time to think up a likable idea outweighs the cons. So, details of each card will come within the next two months.


P.S. I sure hope I'm sticking with the etiquette guidelines that D*S recently posted. I need to be mindful of always crediting the source of these inspirations. Hopefully none of it is considered copying.

P.P.S. Something is terribly wrong with Safari now that I've moved to Snow Leopard on my MacBook. What the heck is going on!? I find it odd that Firefox works better than Safari does on my Mac. Tisk tisk. First time I have to talk down on Apple. It's a sad sad day.

Sunday, January 23, 2011

Gift Wrapped 30th Birthday Card: Bows Glitter and Embossing

I got to practice a new technique and refine two others. This was inspired by Martha Stewarts Holiday Gift Wrapped Cards idea.

Refined technique #1: How to tie a perfect bow. Too bad the ribbon preferred to be straight. I'll never use that style of ribbon again.


Refined technique #2: Glittering. My sister wouldn't be happy if I told her I used spray adhesive for the '30' glitter tag. But, I do have to say that the 3M spray adhesive I used is great. It's super tacky, doesn't stain and doesn't curl the paper. All other adhesives are just nightmares to work with.


New Technique #1: Embossing. looking at the pictures, the embossing looks like it can be both ways. Either you see drops that look like water that form an outline around the letters (this is the melted embossing powder) or you see the letters raised off the paper (just an illusion). A little messy for the first time but not too bad huh? Especially since I'm too cheap to buy a heating tool and opted to hold an iron within millimeters of the paper instead.


Friday, January 21, 2011

Birthday Card: Reincarnation of Bon Voyage Plane

Look familiar? Minor adjustment - this time it's a birthday card to a dear friend that lives far away. And instead of just a regular blank page, I made it a cloud that folds down. I hope she likes it!


Thursday, January 20, 2011

Gift Wrap: Something Luxurious for a Man

As much as I love glitter, flock, embossing, cutting, ribbons and the color pink, I try to be mindful when it's time to hunker down and work on a man's project.

I would like to credit Martha Stewarts Craft Department for the idea. I must have seen this months ago and it just stuck!

I asked my uncle what he wanted for his birthday. He said 'Something Luxurious'. I said 'like what?'. I should have known better than to ask such a silly question because he responded with the definition of the word luxurious. So, ask and you shall receive. [insert smily face here].


Wednesday, January 19, 2011

Bon Voyage Transparent Card: Taking flight!

I needed A LOT of inspiration to make this Bon Voyage card. After my disaster of a 'Aging like fine wine' Birthday Card, I had to make this next card a good one. Especially since the recipient and the signers are people who are all very talented artists.
I searched the words 'bon voyage' in Google Reader (basically searching all the blogs I subscribe to) and found this Eat Drink Chic inspiration post. I went with the plane in flight, gave it a little message in tow, stuck with my transparent card theme, and incorporated photos of his friends who will dearly miss him.
Here are the raw parts cut and also sketched using my Silhouette:


And here is everything put together.


Tuesday, January 18, 2011

Birthday Card: Battle of the composition versus color

This card just needed help in general. Poor color choices and poor allocation of content. This is a post of what NOT to do in the figure.
UGH.


Monday, January 17, 2011

Make It Yourself Silhouette Sketch Pen

My adventures of shopping for the best price on Silhouette Blade Replacements took me toScrapbook Express. For kicks, I also picked up the Silhouette Ballpoint Pen Holder.
Talk about cool! Now there's a way to 'print' on tiny pieces of scrap paper. Furthering my 'green' efforts!

Pretty neat huh? This technique was used on a transparent wedding card. As an aside, here's a shot of the backside stamped with the color Velvet from the Mosaic ColorBox PetalPoint Option Pigment Ink Pad. It must be my ignorance of what Pigment Ink can be used for but it's nice to see the light color ink show on the dark color cardstock.

Thursday, January 6, 2011

Transparency Card part II: Encouraging our New Service Men

I went a little crazy with the spray adhesive on this one so now I'm typing with sticky fingers. I made a huge Silhouette Studio discovering with this project - Auto Trace! Yep, the new version provides auto trace with imported JPG images. KILLER! See the silhouette of a police badge? Yep - an imported JPG image that's been traced.

I made a blunder though - my blade lost it's oomph cutting the transparency papers. I'm not sure if the paper did it or it was just worn down already but I'm pretty disappointed that it's only been 3 months and the blade has already crapped out on me. OH well, blade #1, It's been a good run.


Card: Happy New Years in a Transparent Kind of Way

I think it's absolutely genius that the company that markets the Silhouette Machine ALSO has a blog of fabulous ideas! I fell in love when I saw this post about creating a card using transparency paper. It took me two months to convince myself to buy the transparency paper but $32 & 100 Write-Only transparency sheets later, my creation was made.

Cards made out of transparency paper has it's downfalls though.
  1. It's probably not the greenest of products.
  2. Fingerprints get EVERYWHERE!
  3. The Silhouette has to be on the highest force setting possible to cut the dang transparency paper.
  4. Damn that paper, especially if you want the inkjet printing compatible version, is SUPER expensive.
  5. Whatever you choose to affix on it has to be glued on discretely or very neatly.

On the plus side, It doesn't warp when peeling it off the Silhouette cutting mat like paper does and it doesn't leave residue (that I can see at least) to further de-stickify the cutting mat. And ultimately, it's unique and pretty stunning in my opinion!

Tools used for this project:
1. Silhouette SD (both in cut only mode and print & cut using Registration Marks)
2. Double sided tape to tape the ribbon
3. 3M spray adhesive


Sunday, January 2, 2011

Green Christmas Wrapping

Happy New Year!

A little belated but here are the beginnings of my Christmas Wrapping circa December 13th. The bigger, finished pile didn't get photographed but all the wrapping accessories got returned to me! Everyone felt bad throwing the ribbon, etc away SO I got most of it back. Maybe next year they'll get photographed, if I'm feeling 'green' again. :-)

This year's wrapping was inspired by ideas such as Design Sponge's recycled gift toppers and Paper Crave's creative wrapping embellishments.

Wrapping Paper: My creativity FINALLY came to me! I put away the left over paper from last year and pulled out reams of brown paper. The brown paper is courtesy of all the companies I ordered from that used these reams to stuff their packages.

Embellishments: I coupled the brown paper with an assortment of last years ribbons, the breakdown of my gold floral crown from last halloween's Greek Goddess costume and pieces old jewelry.

Gift Tags: Ornament gift tags were courtesy of my Silhouette SD & Lori Whitlocks 3 Ornaments design.