Friday, April 1, 2011

Birthday Card: Dressed in Twine, Part IV - Top Load Notecard Holders

On the day I started this project, I received my very first batch of bakers twine in the mail. I ordered several samples from SeeSpotStamp's Etsy Store after doing calculations upon calculations of the cost per yard for all the bakers twine sold on Etsy. SeeSpotStamp had the best price for nice colors at about 6cents per yard. Can't beat that considering other brands were coming to 20cents per yard.
Lets regress to the elements that comprise of this project:

[Theme] This project got it's pink theme because I wanted to use the Cherry colored bakers twine
[Dress Form Shape] Because the theme was pink, I chose to use Silhouette's dress form shape. I make it a habit to open Silhouette Studio each week to download the free shape of the week. The dress form was that weeks shape.
[Birthday cutout] How dull would it have been if I just made the text straight across? Luckily I stumbled upon this Silhouette tutorial that demonstrates the ease of laying out text along a line or a shape. I should have known that the font was going to cut real thin. Unlike the other two holders, I had to reinforce this one because it was too flimsy alone. I glued a 3"x3" square piece of cream colored cardstock that was stamped using a circle pattern rubber stamp and distress ink.
And this birthday card for my sister concludes the Top Load Notecard Holder sequence!

Sunday, March 13, 2011

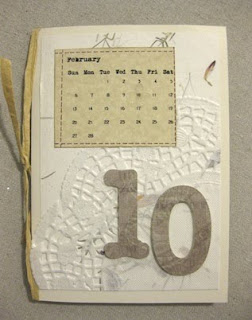
Birthday Card: Doily for a Dolly turning 30, Part III of Top Load Notecard Holders

She's a classy lady. So I had to make it a classy card. My favorite detail is the doily. This was a last minute addition inspired by Martha Stewart's Valentine's Day Doily Envelopes idea. I wanted something to show behind the '30' cutout but I didn't know what. Good thing I stopped at the dollar store for the doilies!


Thursday, March 3, 2011

Birthday Card: Happy Birthday Man, Part II of Top Load Notecard Holders

I always have trouble coming up with ideas for men's cards. That was until I stumbled upon a random scrapbook post by Kerri Bradford. I want to take a moment now to give her praise. I absolutely love the organized composition of all her work. It's so tidy and creative!
Lets regress -
[PAPER] Designing the 'BIRTHDAY' cut was easy. Cutting the paper was the tough part. After buying Wausau paper at Target, I now understand why that cream color cardstock at Print Icon was on sale for $3. Wausau paper cuts consistently using the yellow Silhouette Plunger Tip. The discount Print Icon paper required an hour of Xacto kniving even after the Silhouette took its cut at it. NOT FUN. I'll be sure to limit any cutting projects for the Print Icon discount paper.
[HEAT EMBOSSING] While I'm on the topic of cheap paper - look what happens when you try to heat emboss black embossing ink onto cheap paper. It melts and winds up looking like a horrible print job. NEVER AGAIN.
[LABEL SHAPE] After cutting the 'BIRTHDAY', it reminded me of the black and white marble notebooks we used to have in grade school. So, to give it the name label look, I used one of the 50 free shapes I got with my Silhouette. Using a pen and the Silhouette Pen Holder, I noted who the card/notebook belonged to.
Not so bad after all with a few additional details.


Friday, February 25, 2011

Birthday Card: Baby's First Birthday

I got a chance to mix up a few things for this card.

Background: Cocoa Background is embossed using the Cuttlebug polka dot impression folder.
Balloons: Cut using the Silhouette SD and tied with hemp cord.
#1: Fabric stiffened using Stiffen Stuff and cut using the Silhouettte SD.
#1 outline: Using Silhouette Studios Offset functionality, the outline around the #1 is cut from vellum paper.
Ribbon & Doily: How did we tie up the loss ends? With a cutout of a doily and some ribbon.

Monday, February 21, 2011

Texture Embossed Card: To Cuttlebug or not to Cuttlebug?

I decided that since I already have the Silhouette SD, the texture boutique would suffice.
In the short time that we've been together, my relationship with the Sizzix Texture Boutique has become one of love.
It came just in time for me to wish a friend a happy 2 year wedding anniversary and another friend a happy birthday. Its amazing what a little texture can do to a solid color card stock. These cards were surprisingly very easy to make. WYSIWYG.